Features
6 Bumpa Features That Make Your Online Store Look More Professional
Features



Not on Bumpa yet? Let bulk buyers see their discount before they ask. Start your 14-day free trial and see how Bumpa makes your online store look more professional. 💚
Picture this. Someone sees your post on Instagram, likes the bag, and taps the link in your bio. In the next few seconds, before they've even checked the price, they're deciding one thing: is this a real business?
Nobody says it out loud, but we all do it. We look at the link. The layout. Whether there's an About page, or anything about returns. Looking established has very little to do with how big you are. It's the small details, and the good news is that most of them are settings you can switch on today.
So here are six Bumpa features that take care of those details, in the order your customer runs into them. (And if your store has felt a bit quiet lately, these 5 urgent fixes are worth a read too.)
1. Custom domain


Quick question. Which one would you trust with your money: yourstore.bumpa.shop or yourstore.com?
It's a bit like business cards. One with a Gmail address works fine. One with your own domain looks like you've been at this for a while.
A custom domain swaps your default Bumpa link for a .com, .ng, .org or whatever domain fits your brand. Already own one? Connect it through a short guided flow. Don't have one yet? You can buy it right inside Bumpa. Either way, head to SEO & Website Management, then Domains. (The same page lets you edit your Bumpa URL too, if your current one isn't quite right.)
One thing before you hit connect: your store link updates to the new domain once it's connected, so update the link in your bio and anywhere else you've shared it. And a nice bonus if you're on a yearly plan: your .com.ng purchase and renewal is free.
A proper domain is easier to remember and pass on by word of mouth, and it's what people see when your link gets shared or turns up in Google. Our guide to buying and setting up a domain walks you through it, and if search is on your mind, here's how to improve SEO for your Bumpa website.
2. Premium themes

Think about the last boutique that made you want to buy something the moment you walked in. Clean shelves, good lighting, things grouped so they make sense. Now think about a stall where everything is piled on one table. Same products, maybe. Very different feeling.
Your homepage is your shopfront, and your theme decides how it feels. Under SEO & Website Management, then Site Customisation, you'll find a whole library of themes, each with Apply Theme, Customize and Purchase buttons. Filters for Fashion and Electronics help you start with themes made for your kind of business, and the default Bumpa theme is always there if you just want to get going. Some themes are paid, some aren't. (Want ideas first? Here are 6 Bumpa websites designed with the new themes.
The fun part is Customize. That's where you can:
Set your branding: favicon, theme colour, font and a page title banner (the recommended size is 1440 × 350).
Build your homepage: a hero section, About Us, FAQs, collections, new arrivals, your Instagram posts and even a video gallery.
Add trust sections: customer testimonials, your return policy and your terms of use.
Make it feel personal: a message in the top banner, a WhatsApp chat button and your social media handles.
If you stock other brands, there's one more section worth turning on. Create each brand with its logo under Products, then Featured Brands. Then switch on Brands → Feature Brands in Site Customisation. Your customers get a "shop by brand" section, and your store starts to look like a proper retail shop rather than someone reselling from their phone.
One tip from us: only switch on the sections you'll keep updated. An empty testimonials section looks worse than no testimonials section at all. Our post introducing the new themes has more on what's available.
3. Pages

Be real with yourself for a second. Before you pay a store you've never bought from, what do you check?
Most of us look for the same things. Is there an About page? What happens if I need to return this? Is there a way to reach an actual human?
Pages are where those answers live. Go to SEO & Website Management, then Pages, and click Create Page. Every page you make shows a thumbnail, when you last edited it and whether it's published. Turn on Activate Pages and they appear in your website footer, which is exactly where careful shoppers go looking.
Starting from scratch? These five do most of the heavy lifting:
About Us
FAQs
Shipping & Returns
Privacy Policy
Terms
While you're sorting out your footer, give your photos a home too. Your Instagram grid probably looks great, but your website only shows product shots. That's what the Photo Gallery is for. Go to Store Setup, then Photo Gallery, and switch on Activate Gallery. It lives in your footer alongside your pages. Give it a name (that's the menu label your customers will see), then create albums and keep each one as a Draft until it's ready to publish.
Lookbooks, behind-the-scenes shots, event photos, customer photos, your products being used in real life. These are the pictures that tell people there's a real business, with real people, behind the store.
4. Size chart

It's 11pm. Your phone buzzes. "Hi, please what size should I get? I'm usually a 12 but sometimes a 14."
Now multiply that by every customer, and add the returns from the ones who guessed wrong. Fashion sellers, this one's for you.
A size chart answers that question before anyone has to ask. Go to Settings, then the Products tab, and upload your chart under Product Size Chart. It's one general image that shows on all your products, so if your sizing changes a lot between items, design the chart to cover that. You can change or remove it whenever you need to.
While you're on that tab, two of its neighbours are worth a look:
Product Note lets customers add a note to a product, like "Engrave this name" or "Preferred colour". You set the title and placeholder, and you can make it required.
Product Additional Image adds one extra image to every product, which is a handy spot for a care guide or delivery info.
Fewer DMs, fewer wrong sizes, and customers who feel like you thought about them before they arrived.
5. Checkout customisation

Here's the thing about checkout: it's where surprises cost you money. A fee nobody mentioned. No idea when the order will arrive. An option they were supposed to pick and didn't. Any one of these can make someone close the tab with a full cart.
There isn't one big checkout setting on Bumpa. It's a handful of small ones spread across your dashboard, and together they make paying feel clear and calm.
In Settings → Shipping
Add a Checkout Note that customers see just before they pay.
Set your delivery timelines: days, delivery windows, same-day options and processing days.
Offer customer pickup, with your address, phone number and opening hours shown at checkout.
In Settings → Products, switch on Require Product Addons so customers pick any required add-ons before they add to cart.
In Payment Methods → Online, choose which payment methods customers see, decide whether you or your customer covers the transaction fee, and show that fee at checkout so nobody's caught off guard.
In Settings → Inventory, turn on Reserve Inventory to hold items in a customer's cart for a set time while they finish paying.
And for the people who still leave before paying? That's what abandoned order recovery under Settings → Orders is for. It sends email and SMS reminders on your behalf, and our post on automated abandoned order reminders explains how it works.
6. Invoice notes

The invoice is the last thing a customer gets from you. It's also, very often, the thing they screenshot and forward to someone else. So why leave it blank?
Invoice notes put a message on every invoice you send. It's a general note that shows on all of them, and you can save several, though only one is active at a time. Each note has its own on/off toggle, you can edit or delete it, and the New Note button adds another.
What goes in one? A few ideas:
A short thank you for shopping with us.
Your returns policy and delivery timelines, with a link to the full policy.
Terms, like "orders must be picked up within 4 days".
Your bank details, so customers know exactly where to pay.
A seasonal greeting.
That last one is where it gets fun. Because only one note is active at a time, you can switch from your everyday note to a Black Friday message or a festive greeting in seconds, without touching a single invoice. Notes support basic formatting and links too. Just keep in mind that the note is store-wide, so you can't set a different one for each order.
Our post on Invoice Generator 2.0 covers more of what our invoices can do for you and your business.
Over to you
If looking professional is your priority, setting up a Bumpa store is your next step. You don't just get everything you need to run your business more smoothly. You also get a professional website, with plans starting from ₦15,000 per quarter.
Curious what comes with each plan? Here's what's free and what's paid on Bumpa.
Not on Bumpa yet? Build your store and give that Instagram click-through somewhere worth landing.
Frequently Asked Questions
1. How do I make my Bumpa store look professional?
Start with a custom domain and trust pages like About Us, FAQs and Shipping & Returns, then pick a Bumpa theme made for your industry. Add a size chart, clear checkout details and a branded invoice note.
2. Can I get a free domain on Bumpa?
On a yearly plan, your .com.ng purchase and renewal is free. You can also connect a domain you already own.
3. Are Bumpa themes free?
The default Bumpa theme is there for everyone to use, and some premium themes are paid.
4. Can I add a different size chart for each product on Bumpa?
No. Bumpa uses one general size chart image across your whole store.
5. Can I use different invoice notes for different orders?
No. You can save several notes on Bumpa, but only one is active at a time, and it shows on every invoice.
6. Where should I put my return policy on Bumpa?
A Shipping & Returns page is its main home. You can also add it as a section in your theme, or in your invoice note.
Related Articles
View Related Articles Here

Features
How to Improve SEO for Your Bumpa Website in 14 Steps

Tips
How to Serve Many Customers at Once With Bumpa POS Without Losing an Order

Features
6 Bumpa Features That Make Your Online Store Look More Professional

Features
How to Set Up Wholesale Pricing for Your Business in Nigeria

Features
B2B Store in Nigeria: Sell to Retail and Business Buyers From One Bumpa Store

Tips
How to Switch to Bumpa Before Black Friday (Without the Risk)

Tips
6 Ways to Use Bumpa to Get Paid Faster and Never Chase Payments Again

Entrepreneurship
How Bumpa POS Helps You Run a Physical Sale Without Losing Track of Stock or Money

Entrepreneurship
How to Sell in Your Shop and Online at the Same Time With One POS

Features
How to Use Advanced Settings on Bumpa Loyalty

Features
How to Activate Loyalty Points Feature on Bumpa

Features
Grow Your Revenue & Customer Retention With the New Loyalty Points Feature on Bumpa

Spotlight
Think Business Loans Are Stressful? Nineteenth Shoes Clears Up 5 Myths and Tells Us How Bumpa Capital Helped

Spotlight
Meet Tayo Adejumo, The Business Owner Paid 4 Years of Bumpa Upfront in 2022. Here's Why

Tips
5 Best Inventory Management Software for Small Businesses (Online & Physical Retail Stores)

Entrepreneurship
How to Separate Your Business and Personal Finances [2026 Guide]

Spotlight
The Extra Mile: Celebrating Customer Service Week 2026 at Bumpa

Features
8 Things You Can Automate on Bumpa So Your Business Runs While You Rest

Features
How to Set Up TikTok Pixel on Bumpa | Step-by-Step Guide

Features
Collect the Birthday & Gender Information of Your Customers Through Multiple Ways on Bumpa.

Entrepreneurship
How to Get Paid Faster: The Complete Guide to Business Payments in Nigeria & Kenya

Tips
How to Choose the Right Payment Options for Your Customers in 2026

Features
How to Set Up Facebook Pixel on Bumpa | Step-by-Step Guide

Entrepreneurship
How to Build a Good Inventory Management System (Step-by-Step)
Tips
How to Keep Daily Records of Sales for Your Business Easily
Tips
How to Detect, Deal with & Prevent Fake Bank Alerts for Your Business

Sales
How Gift Cards, Product Bundles, and Add-Ons Can Help You Make More Money Per Order on Bumpa

Entrepreneurship
Pezesha & Bumpa Partner to Empower Merchants with Digital Business Tools

Features
What Happens When My Bumpa Subscription Expires?

Entrepreneurship
How to Track Profit for Your Business in Nigeria in 2026

Tips
7 Signs You Need Inventory Management Software In 2026

Entrepreneurship
How to Prepare Your Business for Black Friday (2025): A Simple 10-Step Plan With Checklists and Templates

Entrepreneurship
Black Friday Marketing Strategy In 2026: 7-Day Plan for Small Businesses

Tips
When to Restock Inventory: Reorder Point Guide for Nigerian Businesses in 2026

Entrepreneurship
Inventory Management for Fashion & Clothing Business in Nigeria [2026]

Tips
6 Ways to Stop Staff From Stealing Your Stock (Without Losing Trust in Your Team)

Tips
Instagram Business Account Disabled? Here's Exactly What to Do in the Next 24 Hours (2026 Guide)

Entrepreneurship
From One Blender to 25 Branches and Counting: How FruityLife Manages Its Business with Bumpa

Features
New on Bumpa: The July Updates That Make Running Your Business Easier

Features
Create Emails That Drive Sales with Bumpa's Sales Email Template

Features
June Bumpa Product Update: Here's what's new!

Tips
8 Things To Do Before You Launch Your Online Store In 2026

Tips
10 Ways to Get more Customers & Increase Sales for your Business

Tips
Top 5 Online Selling Platforms & Sites in Nigeria (2026 Guide)
Tips
How to Optimise your Bumpa Website for more Visibility on Google in 2026!

Entrepreneurship
How To Start A Bag & Accessories Business In Nigeria In 2026

Tips
When to Upgrade Your Bumpa Plan And How to Know You're Ready

Entrepreneurship
10 Signs Your Business Needs Better Structure and Organization In 2026

Entrepreneurship
Bumpa vs WooCommerce: Is "Free and Powerful" Actually Free for Nigerian and Kenyan Businesses?

Entrepreneurship
Bumpa vs Shopify: Which Platform Actually Works Best For African Businesses?

Features
Is the Bumpa App Free? (2026 Update: What’s Free, What’s Paid & What You Get)

Entrepreneurship
How to Use Social Media to Drive Sales to Your Bumpa Store In 2026

Entrepreneurship
25 Small Business Ideas in Kenya with Low Capital (2026 Guide)
Features
Every Physical Store You Add on your Bumpa Account Now Has Its Own Terminal Account. Here's Why It Matters

Features
Grow Your Business Faster with Loans: Say Hello to Bumpa Capital!

Features
How to Stop Staff Theft in Your DMs and Your Physical Store Using Bumpa
Tips
Business Name Ideas - How to Generate One + 42 Examples

Entrepreneurship
Bumpa vs Wix: A Guide for Nigerian Business Owners

Entrepreneurship
Bumpa vs Paystack Storefront: Which Is Right for Your Business?

Entrepreneurship
Bumpa vs Flutterwave Store: What Nigerian Sellers Actually Need to Know
Entrepreneurship
7 Marketing Tools You Can Use on Bumpa To 5x Sales. (Free & Paid 2026)

Spotlight
From a Mom's Shop Floor to 10K Orders: How Harjoke Fabrics Automated Sales with Bumpa
Features
Bumpa Wallet Is Here: A Faster Way to Get Paid Instantly, Grow Your Money & Stay in Control
Spotlight
For our One of One, Teejay…
Entrepreneurship
8 Best Paystack Storefront Alternatives Nigeria (2026)

Sales
How to Start an Online Business in Kenya (2026 Complete Guide)

Features
Bumpa POS: A Simple Point of Sale System for Businesses in Nigeria

Entrepreneurship
How Bumpa Helps Business Owners Adapt To Nigeria’s New Tax Laws in 2026
Sales
5 Reasons Why Your Business Isn't Making Money (And How To Fix It)
Features
Selling Internationally: Start Collecting Foreign Payments with Bumpa’s Multi-currency Feature!

Features
How to Get Started on Bumpa: An Onboarding Guide.
Tips
10 Small Business Ideas you can start with 20,000 in Nigeria in 2026
Tips
How to Collect Customer Reviews and Boost Sales With Them In 2026

Tips
How to File CAC Annual Returns Online in 2026 as a Business Owner

Entrepreneurship
Happening Live: 30 Days of Bumpa with Kelvin! (Plus 3M Up for Grabs)!
Features
What’s New This Month for Your Business (November 2025)

Entrepreneurship
Share Your Story, Win ₦500,000: Bumpa Business Story 2025
Features
Bumpa Product Updates: What’s New This Month for Your Business (October 2025)
Features
Your Store, Your Way: Introducing Bumpa Website Extensions
Tips
Black Friday Coupon Code Ideas (2025): 27 Proven Promos + How to Name, Cap, and Track Them
Communities
"We Don't Do Impossible" - Celebrating CX Week at Bumpa
Tips
How to Create Professional Invoices for Small Businesses with an Online Invoice Generator
Tips
How to Create & Start an Online Store in Nigeria in 2024
Features
How to Use the Bumpa App: The Ultimate Guide For Small Business Management
Features
Recover More Sales With Bumpa’s New Automated Abandoned Order Reminders
Tips
Black Friday 2025: The Business Guide to Deals That Triple Your Sales
Spotlight
Ronbee Signature: The Entrepreneur who Ditched the Idea of Being A Professor to Become A Jewelry & Perfume Connoisseur.
Spotlight
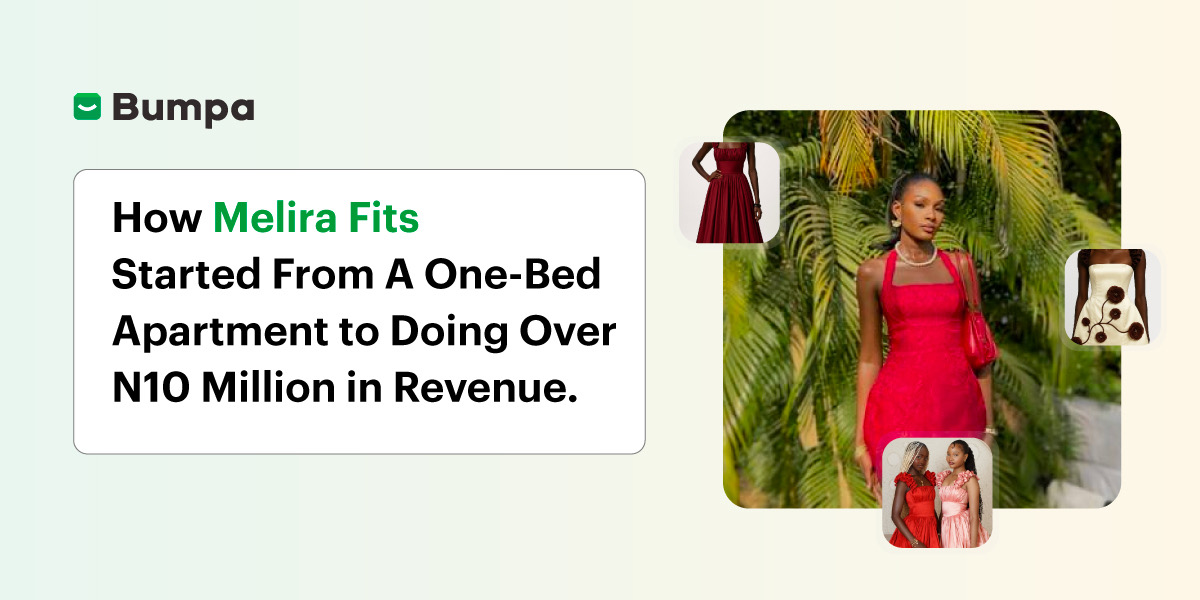
How Melira Fits Started From A One-Bed Apartment to Doing Up To 15 Million in Revenue.
Features
Get Amazon-Level Delivery for your Business with Bumpa’s New Shipping Automation
Tips
How Businesses (Small and Big) Are Making Big Money with AI in 2025! (Here's How)

Tips
How to Make Money on the Internet in 2025 (12 Easy E-commerce Hustles That Actually Pay)

Tips
These 7 Business Finance Mistakes May Cost You Millions !
Tips
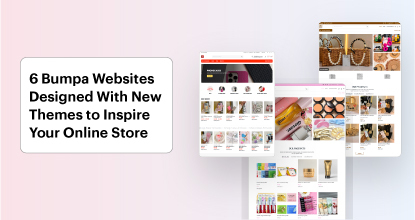
6 Bumpa Websites Designed With New Themes to Inspire Your Online Store
Features
The Ultimate Guide to Managing Your Multiple Stores for Your Business with Bumpa
Features
How to Set Up Google Analytics for Your Bumpa Website
Tips
These 5 Urgent Fixes Will Save Your Dying Online Store!
Entrepreneurship
Be Part of Something Big: Join Our Partners' Program To Help Businesses Go Digital with Bumpa!
Tips
How to Write Product Descriptions that Convert Online Shoppers + Examples & Template
Features
Introducing Brand New Professional Website Themes & Templates For Your Bumpa Store!

Entrepreneurship