Features
How to Get Started on Bumpa: An Onboarding Guide.
Features


Hello there!
Are you new to Bumpa and you need help setting up so you can launch your website or start keeping business records on Bumpa? This article is going to help you set up & get started.
Table of Content
Getting ready to sell online.
Getting ready to manage business records.
How to Get Onboarding Assistance.
Conclusion
Getting Ready to Sell Online.
If you’re new to Bumpa & you need to set up a Bumpa website to start selling online, you only need to complete 4 key steps:
Set Up Payments On Your Website: Add your bank details.
Adding Store Information
Adding Shipping options.
Add products you want to sell.
Optional: Customise your website, and you’re ready to start selling!
Setting Up Payments on Your Bumpa Website: Add Bank Details
Bumpa allows you to easily receive payments in Naira, Kenyan Shillings, Dollars & Pounds on your website.
Here are the things you need to do and know to set this up:
Add the bank details you want to receive payments into.
Select the payment provider that should appear on your website. Bumpa gives you 5 options: Paystack, Fincra, Nomba, Pocket & Bumpa Terminal.
Select who should bear the transaction charge: yourself or your customer. And that’s all!
Key Things To Know About Online Payments on Bumpa
I. Transaction Charges: Each payment option comes with transaction charges:
Paystack: 1.5% transaction fee.
Fincra: 0.5% transaction fee
Nomba: 1.3% transaction fee
PocketApp: 0.8% transaction fee
Bumpa Terminal: N100 for transactions above N5000
Ii. How to Activate International Payments on Bumpa: International payments are set up for you upon request and is made available through our partnership with Stripe. . Click here to learn how to activate it on your website.
Iii. Payment Options: It is advised to have at least two payment methods on your website. You can activate all, if you so wish.
IV. Receiving Payment into a Business Bank Account: If you would like to use a business bank account to receive payments, you would have to complete KYC verification on the app, which requires your BVN, NIN & CAC registration document.
B. Adding Store Information.
Another step you need to complete for your onboarding setup is to add the required store information to help curate your Bumpa experience.
This doesn’t require any assistance, and you’ll be done in a minute.
C. Adding Shipping Options:
Every retail business needs to deliver to its customers, and it’s something that your customers should pay for together with their order.
Here are a couple of things you need to know about setting up shipping on your Bumpa Store:
If you only do Pickups: You can simply create PickUp as a delivery option & put the price at N0.
If you have your own delivery bikes/companies: Set up Shipping pricing manually by adding the locations you deliver to & their prices.
If you want to offer multiple delivery companies on your website; You can use our Automated Shipping option, which is an integration with Shipbubble that allows you to choose or display up to 25 delivery partners on your website, giving your customers the option to choose what delivery company they want and price.
Advanced Shipping Setup: You can set up Delivery timeline, Shipping tracking, weighted shipping, etc., on the General Settings Page.
D. Adding Products.
You can add as many products as you like with specifications like Size, Color etc on your website, set up MoQ & MaxOQ, add Size Chart, etc. on your Bumpa website.
Here are tips if you need help adding products:
Adding products manually: You can watch this video to learn how to add products to your store.
Importing Products: If you’re pivoting from another e-commerce platform or you have a lot of products, you can import all your products at once via CSV or get assistance from our Support team.
E. Customising Your Website (Optional)
So, you’ve completed everything you need to get onboarded. Before you start selling, you may want to customise your website with your brand assets and to your exact specifications.
There are 3 major ways to customise a Bumpa website:
I. Customising the default Bumpa website template: Here you can play around with colors, how your products display on your website, upload your brand logo as favicon, upload banners, and so much more.
Ii. Customising Special Website Templates: You can purchase and customise different website templates like the Vogue, Universal, Allure & Porto themes. These themes give you more design capabilities with your website.
Some Bumpa websites using themes are: Dyelab.co , Moelle Essentials, Akubata Designs etc
Iii. Custom-made Websites: You can request for a custom-made website built just for your brand. Please note that this comes at an additional cost beyond the cost of purchasing themes/templates.
Some Bumpa websites that we’ve custom-built are Beauty Shop Africa, Fine Funky, Fruity Life etc.
2. Getting Ready to Manage Your Business Records.
If all you want to use Bumpa for is to keep your business records digitally so that they are always safe and you can get business analytics and performance from Bumpa, there are 3 core features you need to explore to get started:
I. Start Recording Sales.
Recording your sales on Bumpa is probably one of the most straightforward features to use Bumpa for. If you need help, click here to watch a How To video.
Ii. Create Invoices/Receipts
Invoices and receipts are automatically created when you record an order as paid or unpaid on the Bumpa app.
III. Start Recording Expenses.
If you’d like to keep a record of your business expenses on Bumpa, you can follow the steps listed here to get started.
How to Use Bumpa After Onboarding
Want to explore more Bumpa features? Here are some resources you should check out:
Join Bumpa OpenHouse & Learning Sessions: Hosted every week and shared to your email, you can join our learning sessions that show you more useful Bumpa features to help your business growth and operations.
Bumpa Academy: If you want to learn business strategies and tips, you can take free courses on Bumpa Business Academy.
Bumpa Support: If you need further assistance with understanding a Bumpa feature or you need help, you can visit our Help desk at www.support.getbumpa.com, send an email to [email protected] or chat with a Customer Support Representative with Bumpa Chat.
I hope you enjoy Bumpa to the fullest! Feel free to reach out to us via [email protected] if you have any questions regarding this article. I'm wishing you a seamless onboarding experience and business growth!
Related Articles
View Related Articles Here

Features
Create Emails That Drive Sales with Bumpa's Sales Email Template

Features
June Bumpa Product Update: Here's what's new!

Tips
8 Things To Do Before You Launch Your Online Store In 2026

Tips
10 Ways to Get more Customers & Increase Sales for your Business

Tips
Top 5 Online Selling Platforms & Sites in Nigeria (2026 Guide)

Tips
How to Optimise your Bumpa Website for more Visibility on Google in 2026!

Entrepreneurship
How To Start A Bag & Accessories Business In Nigeria In 2026

Tips
When to Upgrade Your Bumpa Plan And How to Know You're Ready

Entrepreneurship
How to Track Profit for Your Business in Nigeria in 2026

Entrepreneurship
10 Signs Your Business Needs Better Structure and Organization In 2026

Tips
How to Choose the Right Payment Options for Your Customers in 2026

Entrepreneurship
Bumpa vs WooCommerce: Is "Free and Powerful" Actually Free for Nigerian and Kenyan Businesses?

Entrepreneurship
Bumpa vs Shopify: Which Platform Actually Works Best For African Businesses?

Features
How to Improve SEO for Your Bumpa Website in 14 Steps

Features
Is the Bumpa App Free? (2026 Update: What’s Free, What’s Paid & What You Get)

Entrepreneurship
How to Use Social Media to Drive Sales to Your Bumpa Store In 2026

Entrepreneurship
25 Small Business Ideas in Kenya with Low Capital (2026 Guide)

Features
Every Physical Store You Add on your Bumpa Account Now Has Its Own Terminal Account. Here's Why It Matters

Features
Grow Your Business Faster with Loans: Say Hello to Bumpa Capital!

Features
How to Stop Staff Theft in Your DMs and Your Physical Store Using Bumpa

Tips
Business Name Ideas - How to Generate One + 42 Examples

Entrepreneurship
Bumpa vs Wix: A Guide for Nigerian Business Owners

Entrepreneurship
Bumpa vs Paystack Storefront: Which Is Right for Your Business?

Entrepreneurship
Bumpa vs Flutterwave Store: What Nigerian Sellers Actually Need to Know

Entrepreneurship
7 Marketing Tools You Can Use on Bumpa To 5x Sales. (Free & Paid 2026)

Spotlight
From a Mom's Shop Floor to 10K Orders: How Harjoke Fabrics Automated Sales with Bumpa

Features
Bumpa Wallet Is Here: A Faster Way to Get Paid Instantly, Grow Your Money & Stay in Control

Spotlight
For our One of One, Teejay…
Entrepreneurship
8 Best Paystack Storefront Alternatives Nigeria (2026)

Sales
How to Start an Online Business in Kenya (2026 Complete Guide)

Features
Bumpa POS: A Simple Point of Sale System for Businesses in Nigeria

Entrepreneurship
How Bumpa Helps Business Owners Adapt To Nigeria’s New Tax Laws in 2026

Sales
5 Reasons Why Your Business Isn't Making Money (And How To Fix It)

Features
Selling Internationally: Start Collecting Foreign Payments with Bumpa’s Multi-currency Feature!

Features
How to Get Started on Bumpa: An Onboarding Guide.

Tips
10 Small Business Ideas you can start with 20,000 in Nigeria in 2026
Tips
How to Collect Customer Reviews and Boost Sales With Them In 2026
Tips
How to File CAC Annual Returns Online in 2026 as a Business Owner

Entrepreneurship
Happening Live: 30 Days of Bumpa with Kelvin! (Plus 3M Up for Grabs)!
Features
What’s New This Month for Your Business (November 2025)

Entrepreneurship
Share Your Story, Win ₦500,000: Bumpa Business Story 2025
Features
Bumpa Product Updates: What’s New This Month for Your Business (October 2025)
Features
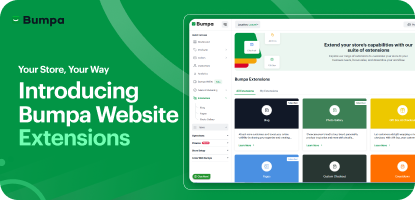
Your Store, Your Way: Introducing Bumpa Website Extensions
Tips
Black Friday Coupon Code Ideas (2025): 27 Proven Promos + How to Name, Cap, and Track Them

Communities
"We Don't Do Impossible" - Celebrating CX Week at Bumpa
Tips
How to Create Professional Invoices for Small Businesses with an Online Invoice Generator
Tips
How to Create & Start an Online Store in Nigeria in 2024

Features
How to Use the Bumpa App: The Ultimate Guide For Small Business Management
Features
Recover More Sales With Bumpa’s New Automated Abandoned Order Reminders
Tips
Black Friday 2025: The Business Guide to Deals That Triple Your Sales

Spotlight
Ronbee Signature: The Entrepreneur who Ditched the Idea of Being A Professor to Become A Jewelry & Perfume Connoisseur.
Spotlight
How Melira Fits Started From A One-Bed Apartment to Doing Up To 15 Million in Revenue.
Features
Get Amazon-Level Delivery for your Business with Bumpa’s New Shipping Automation

Tips
How Businesses (Small and Big) Are Making Big Money with AI in 2025! (Here's How)

Tips
How to Make Money on the Internet in 2025 (12 Easy E-commerce Hustles That Actually Pay)

Tips
These 7 Business Finance Mistakes May Cost You Millions !
Tips
6 Bumpa Websites Designed With New Themes to Inspire Your Online Store
Features
The Ultimate Guide to Managing Your Multiple Stores for Your Business with Bumpa

Features
How to Set Up Google Analytics for Your Bumpa Website

Tips
These 5 Urgent Fixes Will Save Your Dying Online Store!
Entrepreneurship
Be Part of Something Big: Join Our Partners' Program To Help Businesses Go Digital with Bumpa!
Tips
How to Write Product Descriptions that Convert Online Shoppers + Examples & Template
Features
Introducing Brand New Professional Website Themes & Templates For Your Bumpa Store!

Entrepreneurship
ShowUp #2: Love is in the Air! (And So Are Sales)

Tips
How to Turn your Products into Irresistible Valentine's Day Gifts

Features
How to Add Shipping Fees on Your Bumpa App
Features
How does Online Payment Work on Bumpa?
Entrepreneurship
The Biggest Business Growth Event (BBGW) of 2025 Is Here!

Tips
Top 8 Trending Products to Launch a Successful Online Business in 2025

Tips
4 Secret Growth Strategies Smart Businesses Are Stealing in 2025

Entrepreneurship
ShowUp #1: Thank You for 2024 and Welcome to 2025! 🎉
Features
What to Know about Bumpa’s KYC Verification & Fraud Prevention

Entrepreneurship
Shape Your 2025: 50 Motivational and Inspirational Quotes Every Business Owner Needs

TipsFeatures
25 Marketing Strategies for Increasing Sales to Implement on Day One of 2025!

Entrepreneurship
The Season of Sales - Lessons, Tips & Giveaways

EntrepreneurshipFeatures
A Good Time For Gifts: Celebrating Our Super Sellers with WiiCreate! 🎁

Entrepreneurship
How Lagos's Top Parfait Brand, Melony Pine Fruit Hub Manages Its Growing Success with Bumpa
Features
Bumpa's Invoice Generator 2.0: Now with Custom Notes & Upgraded Shipping Slips
Features
Planning Your Next Big Sales? 8 Bumpa Features You Can't Miss!
TipsFeatures
Bumpa Terminal: Now Available in the App!
Tips
Employee Theft: How to Protect Your Business from Staff Stealing
Entrepreneurship
Black Friday's Coming - And So Are Big Changes! 🚀
Tips
How to Create a Free Online Business Website for Your Small Business with No Code

Features
Sending Bulk SMS to Your Customers is Now Better On Bumpa!
Features
3 New & Powerful Bumpa Inventory Management Features Your Business Needs!
Tips
How to Start Selling Korean Skincare Products in Nigeria

Tips
10 Must-Do Things Before Black Friday to Ensure You Sell Out!

Tips
10 Tips for Creating Catchy Business Slogans & Taglines + 20 Ideas for Yours!
Sales
5 Must-Haves for a Successful Black Friday Sale

Entrepreneurship
Empower Your Business Journey with Bumpa Learning Sessions
Entrepreneurship
From Kelvin: Q4 - Time for The Final Push!

Tips
8 Ways to Make Your Business Social Media Page Stand Out!

Tips
How to Start a Jewelry Business Online in Nigeria
Entrepreneurship
From the CEO's Desk: I visited China to Support More Business Owners In August
Tips
How to Sell More to Your Customers with Coupon Codes on Bumpa
TipsFeatures
Bumpa’s Automated Order Processing System for Small and Large Scale Businesses.
Tips
6 Bumpa App Updates You’ll Love for Your Business

Tips
The Simplest Way to Buy & Set up a Domain for Your Online Store

Tips
6 Email Campaign Ideas to Increase Black Friday Sales
Tips